diagram.mmd — flowchart
Blue Green Deployment flowchart diagram

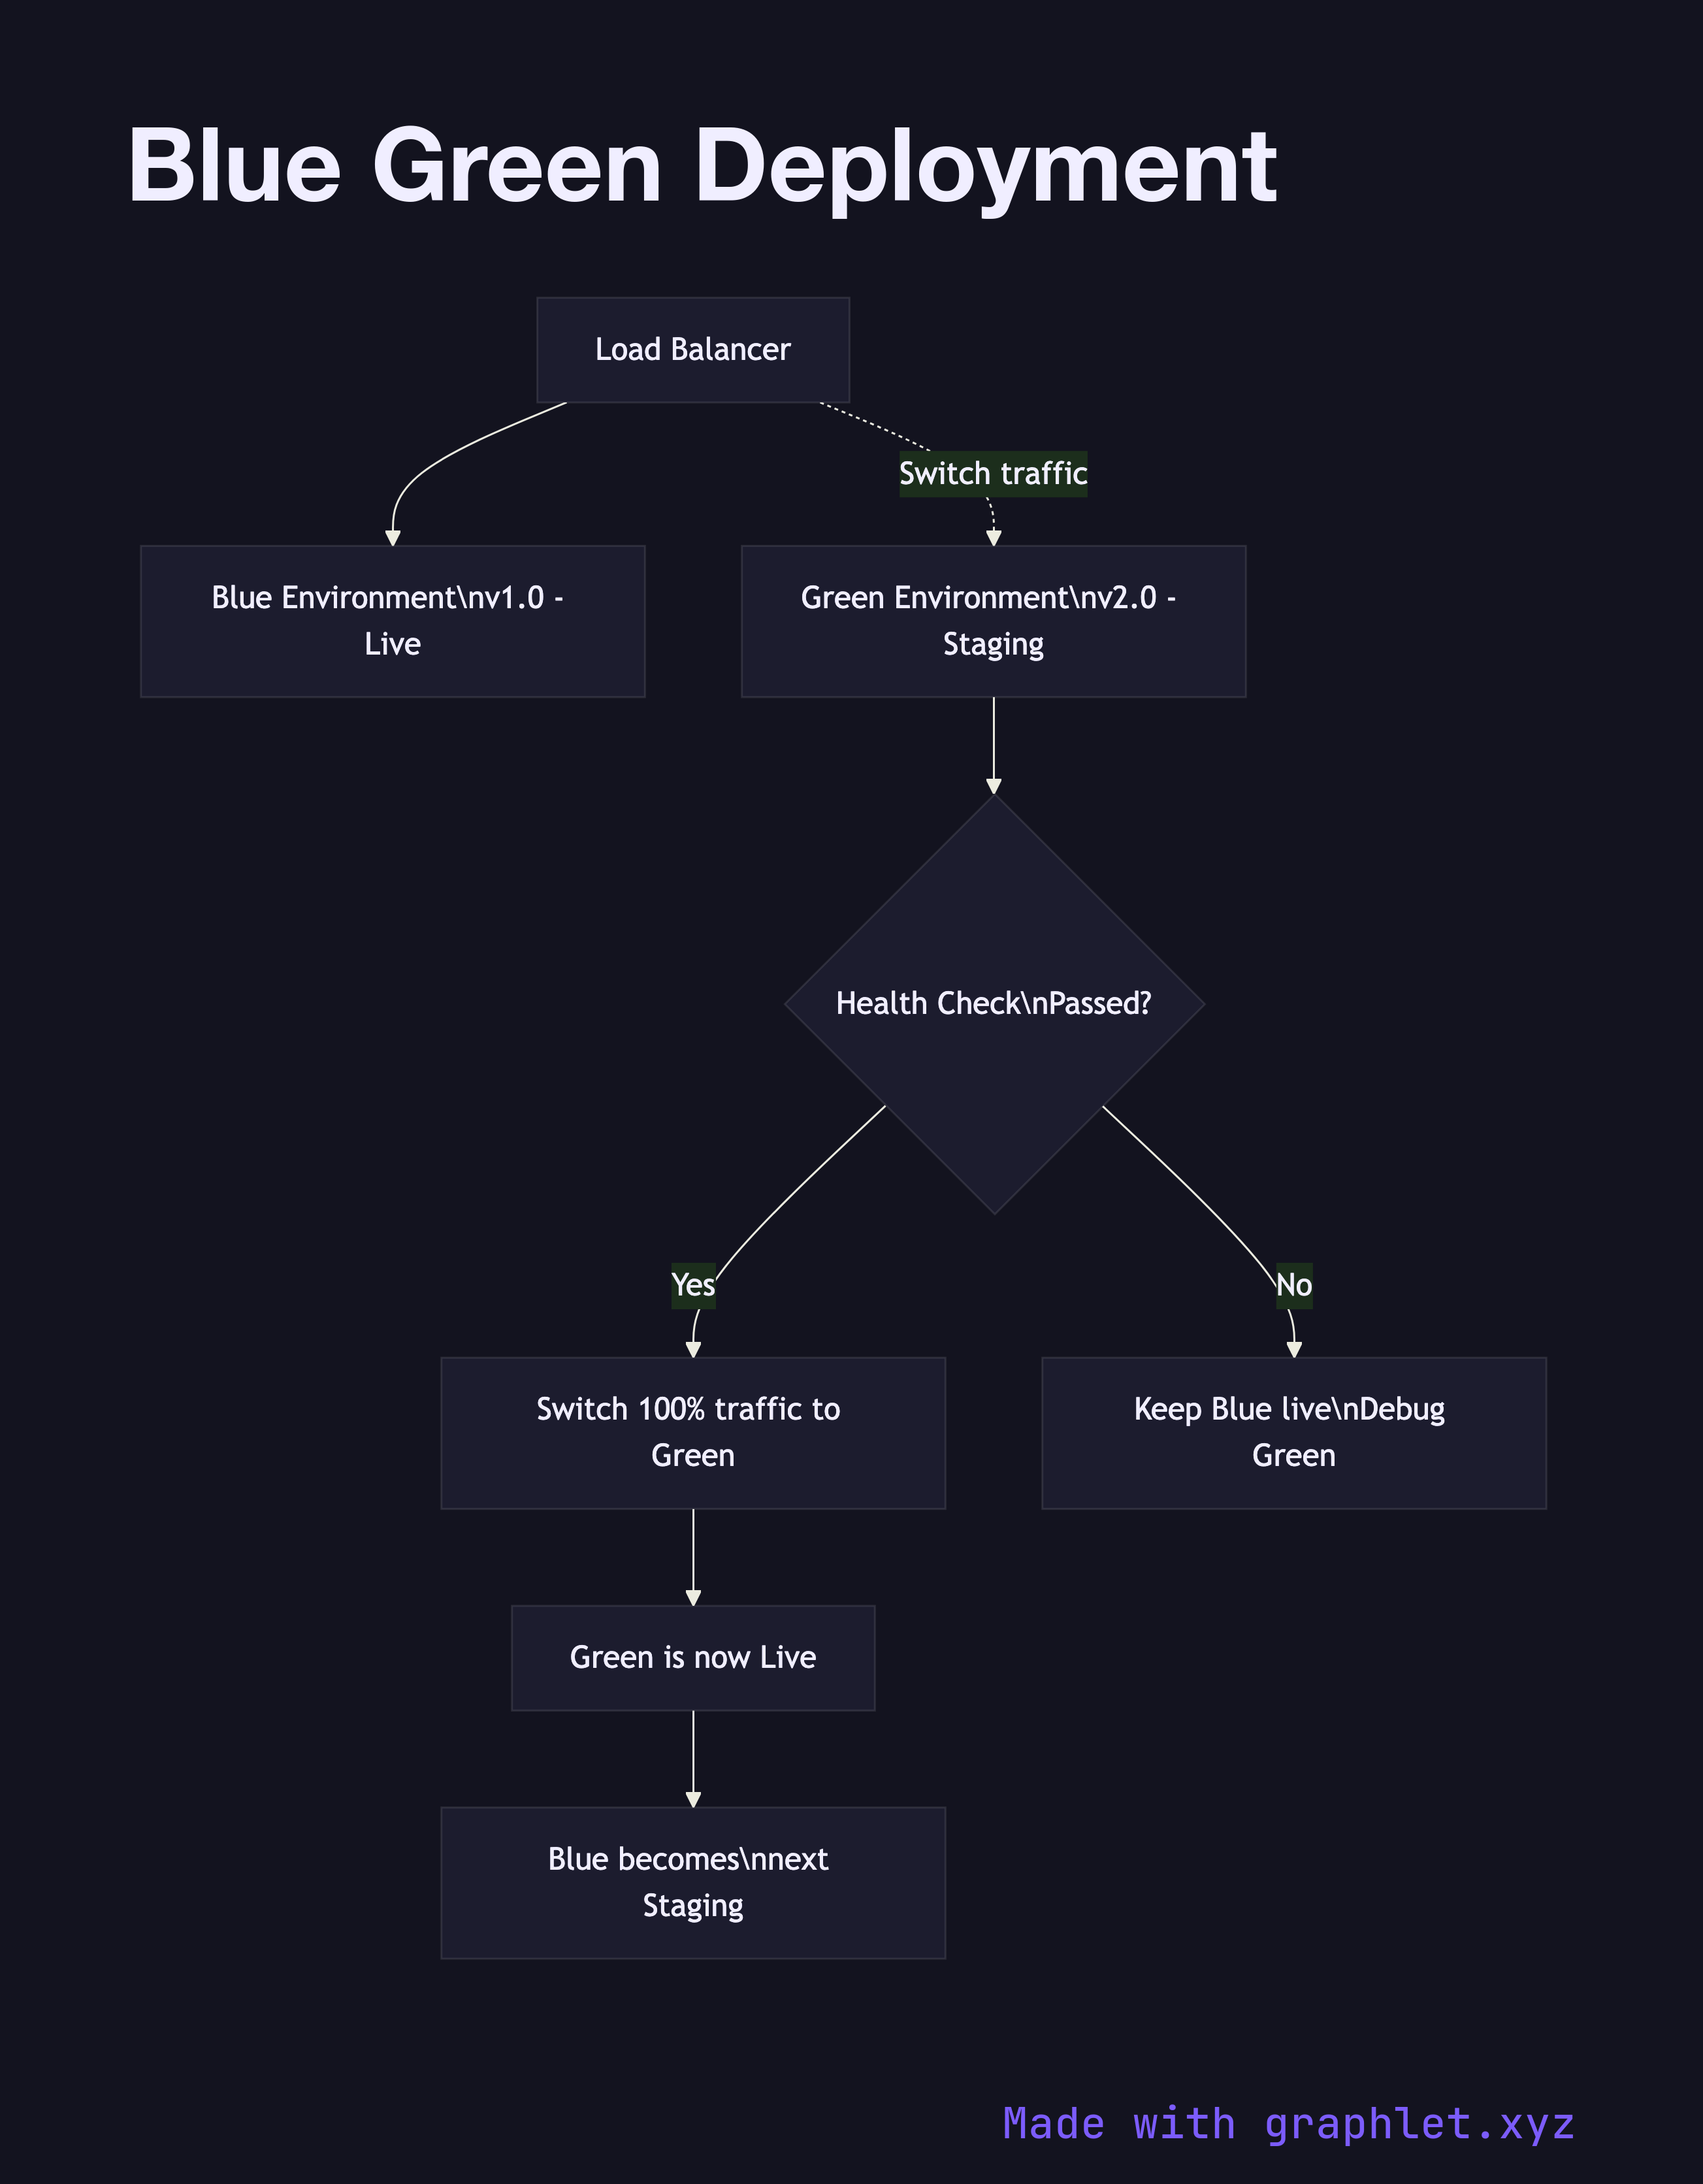
Blue-green deployment is a release strategy that runs two identical production environments — Blue and Green — and switches all traffic from one to the other atomically, enabling instant rollback and zero-downtime releases.

What the diagram shows

The diagram shows a Load Balancer initially routing 100% of traffic to the Blue Environment (v1.0 — currently live). The Green Environment (v2.0) runs in parallel but receives no live traffic while deployment and smoke tests execute. A Health Check gate evaluates Green: if all checks pass, the Load Balancer is reconfigured to send 100% of traffic to Green in a single atomic switch. Green is now live. Blue is kept running as a warm standby — it becomes the staging environment for the next release cycle.

If the health check fails, traffic stays on Blue and the Green environment is debugged without any user impact.

Why this matters

The defining property of blue-green is the instant cutover: because you flip traffic at the load balancer level, there is no period where both old and new code are serving production requests simultaneously. This eliminates mixed-version bugs that plague rolling deployments. Rollback is equally instant — point the load balancer back to Blue. The cost is running two full production environments simultaneously, which doubles infrastructure spend during deployment windows. For a more cost-efficient gradual alternative, see Canary Deployment. For a comparison of all approaches, see Rolling Deployment.

Free online editor
Edit this diagram in Graphlet
Fork, modify, and export to SVG or PNG. No sign-up required.
Open in Graphlet →

Frequently asked questions

Blue-green deployment is a release strategy that maintains two identical production environments — Blue (live) and Green (staging the new version) — and switches all traffic atomically from one to the other at the load balancer, enabling instant rollback and zero-downtime releases.
The new version is deployed to the idle environment (Green) while Blue continues serving all traffic. Smoke tests and health checks run against Green. Once Green passes, the load balancer is reconfigured to route 100% of traffic to Green in a single switch. Blue remains running as a warm rollback target.
Blue-green is ideal when your team needs instant, risk-free rollback and can afford to run two full production environments. It suits services with strict uptime SLAs, stateless applications, and teams that release infrequently enough that the double-infrastructure cost is acceptable.
Common mistakes include forgetting to run database migrations that are backward-compatible with both versions, not draining in-flight connections before the switch, and decommissioning Blue too quickly before confirming Green is stable — leaving no rollback target.
Blue-green switches 100% of traffic instantly in a single cutover, offering the simplest rollback but requiring duplicate infrastructure. Canary shifts traffic gradually (e.g., 5% → 25% → 100%) with metric gates at each step, reducing blast radius at the cost of running mixed versions simultaneously.
mermaid
flowchart TD LB[Load Balancer] --> BlueEnv[Blue Environment\nv1.0 - Live] LB -.->|Switch traffic| GreenEnv[Green Environment\nv2.0 - Staging] GreenEnv --> HealthCheck{Health Check\nPassed?} HealthCheck -->|Yes| SwitchTraffic[Switch 100% traffic to Green] HealthCheck -->|No| Rollback[Keep Blue live\nDebug Green] SwitchTraffic --> NewLive[Green is now Live] NewLive --> OldBlue[Blue becomes\nnext Staging]
Copied to clipboard